
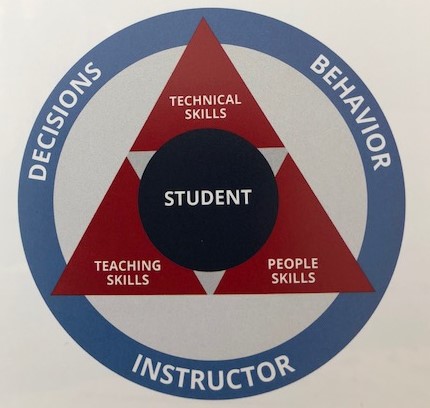
Across all disciplines PSIA has taken a fresh look at the components of our craft through the Learning Connection model. Instructors throughout the Rocky Mountain Division are reviewing the model and, no doubt, are considering where their strengths lay within the Learning Connection.
Instructors of Adapted snowsports, as all industry professionals, like to be well-rounded and able to connect with each guest. Instructors desire the technical, people and teaching skills necessary to provide effective and enjoyable learning experiences during guest lessons. At times, however, in adaptive snowsports, instructors can be so eager to foster success that they assume more responsibility for guest learning and movement experiences than may be helpful to the guest. Bypassing some of these teaching and learning steps can impede progress by that learner. This is typically seen through a very hands-on approach to teaching whereby the instructor attempts to “give” the learner understanding of their body and device rather than allowing the guest to explore a range of personal body movements and feelings that lead to skill acquisition and independence. While hands on assists can help a guest with understanding, care should be taken by the instructor to avoid overuse of assists which can place ownership of the activity on the instructor rather than the guest.
A good example of an instructor-centered biski with hand-held outriggers often follows the steps below and focuses on the instructor imparting experiences and feelings to the guest.
Step 1 The guest meets the instructor and rapport begins to build.
Step 2 Indoors the guest is fit into a biski and hand-held outriggers.
Step 3 The team ventures outdoors and the guest in the biski is pushed by the instructor to a surface conveyor or learner chair to access the learner slope.
Step 4 The instructor takes the guest to the top of the learner slope, dons tethers for safety and seat-assists the biski so that the guest can feel how the biski works and turns.
Step 5 The exhilaration of the secure ride down the slope has everyone smiling and cements expectations for the guest and instructor.
Step 6 Another ride to the top of the learning hill is followed by verbal coaching from behind by the instructor to the biskier about how to hold the outriggers to remain centered, while being seat assisted or tethered by the instructor while riding to the bottom of the slope.
Instructor location and actions: The instructor is tethered behind the guest controlling balance of the biski, direction changes and speed and may be giving verbal instructions to the guest from behind his or her biski while the pair slide down the slope together.
A different and more guest-centered approach to teaching a biski lesson with hand-held outriggers may follow the steps below and focuses on independent skill exploration and acquisition by the guest.
Step 1 The guest meets the instructor and rapport begins to build through discussion about guest motivation, understanding of the biski and biskiing, and assessment of physical abilities.
Step 2 Goals and expectations are discussed and adjusted as necessary.
Step 3 The pair engages in pre-experience activities indoors or outdoors, such as equipment orientation out of the biski, viewing videos of beginning progression, and looking at a map of flat learning areas where first experience activities will occur. They build a plan together and check for common understanding of it.
Step 4 The guest and instructor venture out to the flat learning area and engage in stationary and simple games, activities and exercises that help to build knowledge and understanding of how a biski works with the guest’s body in it and explore outrigger placement and use for balance and mobility.
Step 5 The pair practice straight runs on flats to a natural stop via a gentle push from instructor or on a very slight slope after the biskier pushes backward a few feet up a very slight incline. The instructor may assist the biskier up the slight incline by pushing from the foot rest with possible help by guest using his or her outriggers to push backwards.
Step 6 Next the biskier practices straight runs to an outrigger slow and stop with the guest using the diverging wedge technique with the outriggers.
Instructor location and actions: When stationary, the instructor faces the guest in the biski to explain concepts or activities, draw examples in the snow, or model movements from a kneeling position with or without using a pair of biski outriggers. If the instructor is unable to kneel, he or she may stand in front of guest and give demonstrations with or without stand-up outriggers in a stationary position or actively show effective outrigger movements while walking through a turn. The instructor should stand in a place where the guest can see without craning his or her neck and head upward to view the demonstration. Teaching in front of the guest and the biski also provides safety assurance to the guest, allows the instructor to give gestural directions, and lets the instructor receive the footrest of the biski if light assist is needed due to a loss of speed or directional control by the guest. This position also permits the instructor to aid the guest, via the foot rest, in pushing himself or herself backward up a small slope.
The second approach employs teaching strategies that help the guest to learn and claim ownership of beginner biskiing skills. Through an assortment of activities, exercises and instructor location, various learning preferences of the guest are addressed. It allows the guest to seek, understand and maintain internal balance without instructor input disrupting this learning process. Use of flat terrain in the beginning of the lesson allows the guest time to process information, explore, understand and adjust movements. It permits scaffolding of movements to achieve greater levels of skill. This allays fear, promotes independence and builds confidence.
This teaching approach also provides benefits to the instructor. Up-front teaching at this level lets the instructor participate in visual movement analysis to assess seating set-up, observe lateral and fore/aft positioning of the guest and its effect on balance in the biski, and view symmetry of the guest’s movements and their impact on achieving directional control of the biski.
The strategies mentioned above can be used as a template for lessons in all the adapted snowsports disciplines and at every level of learning. These lessons can build in complexity of activities, skills and terrain to support skill acquisition and develop confidence of the skier while maintaining safe lesson situations for both the guest and instructor.
At times an instructor may choose to provide temporary hands-on assists or molding of the skiers’ position to help the guest understand his or her body in space or relationship to the slope or equipment. Occasionally, a tether may be applied to the guests’ equipment for safety or directional control if the guest is deemed to have challenges with impulsivity, judgement, attention, or truly lacks the coordination or strength to develop movements without physical guidance. A tether is not a replacement for skilled teaching.
There are many aspects to the Teaching Skills component of the Learning Connection and used well they can bring joy and sense of accomplishment to both the instructor and guest. Explore this topic further by engaging in peer discussions, observing veteran instructors in adaptive as they teach lessons, watching skilled instructors in your resorts ski and ride school, and by reading more about it in PSIA’s Teaching Snowsports Manual published in Fall 2018 and available from the PSIA-RM-AASI office, through the PSIA Accessories catalog or online at www.thesnowpros.org.
-Beth Fox
Adaptive Alpine Committee Chair